
I am just starting this phase, 2/2011. It will also probably be the most expensive except for maybe the paint job. As you can tell from the initial state of the car, I am forced to buy NOS or replacements for all interior parts as well as a new front bumper that along with the rear quarter bumpers will need re-chroming. Once I find a decent place in NE, I will post it along with all the other vendors I used fro this project.
Right now I am building a shopping list of what I need and will start doing price comparisons like I did with the Phase 1 and 2 part orders and then make a couple of large orders after negotiating a bulk discount. VB will usually give up a 5% deal if I go through a local rep and Rimmer Brothers have given me 15% in the past.
4/12/2011: A bit of an update, still working on a parts list, but picked up some stuff that came up as well as refinished some interior parts. Car body is in a holding pattern as Nick is finishing up a couple of other projects. We just decided to bring the frame in to make sure the nose fits well with the body, so hopefully we can do that this coming Monday the 18th.
I picked up a nice pair of SU HS2 carbs off of ebay, just missing the EGR valve that I need to find (no luck so far). Here is a nice picture of them:

CLeaned used set of HS2 for Later
I am hoping they work as well as they look, since I will not be using them right away. I want to get a baseline with the Zenith Stromberg installed, which I cleaned up myself.

Cleaned up Zenith (a little Aluminum Oxide to get the rust off)…
This carb worked fine 5 years ago when I last started the car and when I took it apart, it was really clean inside. Hoping it will make things easier to get going for the first time, before switching to the SUs.
I have also been working with C&G Woodcraft to make a new dash. I decided to switch to the choke and ignition setup from the ’69 GT6+ since the metal work was cut for it and is logical rather than that stupid column mounted knee banger. I also decided to move the light switch up and rotated to add a third gauge to the center cluster, so I will now have a Fuel, Volts, and a dual Oil Pressure/ Water Temp gauge as well as a lighted 12V socket on the passenger side panel. I am driving down to his shop on Friday after making a run to the Nu-Chrome place in Fall River Mass. to pick out the right veneer (Walnut Burl or Rosewood). The price is high due to the custom work, but it is the objectg I will be seeing the most while driving, so worth it.

Example new layout for the ignition and choke. (Thanks to Dave Doehler) on NASS for the Picture)
I wound up going to Stafford Springs Swap meet on Sunday the 10th, and was sadly disappointed. however I ran into the Nu-Chrome sales guy right away (who I have been trying to meet for some time). He had some excellent examples of repairs and re-chrome jobs and did a loose quote of fixing and chroming my front bumper of $250 or so, which I was very happy with. Doing the little pieces may be a little high, $50-$75 each, so I will have to be careful. I figured on taking Friday and making the 2hr drive there to get quotes and then hit Woodcraft to finalize the dask layout and wood choice. Below is an example repair:

Example Nu-Chrome Repair
I am hoping mine come out just as awesome.
I also took a ride up to Manchester NH to a see a guy from Craigs list. I wound up getting a set of ’70 seats for $30 with sliders that work, but the seats are wasted. I am going to have to weld in new metal on the bottom and all rubber supports and foam needs replacing. Not much I can do, I have not been able to find a decent set. To order all the pieces from Newton Commercial, will run me $1050 to fix both seats. I am running the frames over to Stitches in Lawrance Mass hoping he can do something that looks good but costs at least half that. Below is the best of the two seats with the covering and without:

Original covering, but real damage hidden.

One frame after taking it apart.
I am hoping there is enough left after the sandblaster hits it. Oh well, they are the most rare of the Spitfire seats.
On the reconditioning front, I finished rebuilding my heater box, came out pretty good with the new felt seals I made and attached. I also sandblasted and powder coated the petal boxes as well as the vents and a few other pieces:

New felt on inside of Heater box

Final Heater box, see the felt through the outlet?

Powdered coated vents and parking brake

Finished Pedal Box
I probably should have tried to cleanup the pitting before powder coating, but I have been going overboard already, so I think the powder coat will make it look good enough. Maybe for the next car.
I got one good piece of news, since I decided not to use the side markers, I found out that the Ambers go for $72 OEM and the Reds are not even available. So I have a complete NOS set I am hoping to sell for a good price to help recoup some money:

NOS Side Markers

NOS Side markers with boxes
4/15/2011: Well, drove a total of 500 miles while taking Friday off and finalized a bunch of stuff. I met with “Nu-Chrome” and dropped off most of my pieces, front twisted bumper, rear quarter bumpers, Mk 3 door handles, headlight rings, wiper switch bezel, rear latch, aluminum windshield cap and aluminum grill and a couple of other items for quotes. Forgot the worse items, the rear trunk hinges and the bonnet latches (only one of the three I have are presentable). Jack was not there, so will have to wait for prices.
I then drove from Fall River, to Norwalk CT to “C&G Woodcraft”, 2.5hr drive, to finalize the dash layout and wood choice. Decided to switch to the push/pull Hazard switch from a Mk IV and the choke ignition from a ’69 GT6+. I also stuck with the three gauge center console. Gary helped me pick out a beautiful walnut burl, with a slight yellow stain and high gloss finish. Below are two sample picks of a different dash with the same wood:

Low ligh shot

Sunlight sample shot
Total cost, with leaving him my original late Mk 3 dash for a future template for someone else came out to be $400. About double what my budget was, but it is the item I will be looking at the most. Those nice new chrome bezel gauges will look sweet in it. I found a vintage Volts meter from the UK, that should be perfect.
5/5/2011: Well, after waiting for a final quote from Nu-Chrome, I got a call today saying they were already well underway doing the work…. without the normal deposit. I quickly sent them a check along with the best two B-pillar caps that Steve Spangler sent me for them to cleanup. I will not talk the final bill, it even scares me, but it is still very reasonable for the amount of work they are doing: Repairing and chroming the front bumper and overriders, both rear quarter bumpers, the gas cap, the rear trunk hinges, the door handles and buttons, the trunk handle and bezel, the wiper switch bezel, both rear light mounts, both headlight rings and both bonnet latches (whole assemblies). They are also cleaning and re-anodizing the aluminum grill, top windshield trim and both B-pillar caps.
6/10/2011: Well the dash is in and looks awesome, I am hoping that the decision to use the push/pull hazard switch does not turn into a mistake. I also got my orders in from the Roadster Factory, Victoria British and Rimmer Brothers. Forgot some stuff of course and some stuff did not work out. The dash top from the Roadster Factory was only for Spitfires up to 1970 and would not work, bump in center, and it should be that far out all the way across, so I had to return it along with the column light switch, which I will have to get from SpitBits instead. The Mk IV wiring harness that Rimmer Brothers thought would be a close match to the 1970 turned out to be way different due to changes from bullet connectors to spade connectors and some gauge/indicator sockets switched from E10s to plug in ones, which will not work with the LED E10s I bought from Autolumination.com, so I had to send that back and now my harness is back ordered until June 30th. The new 14×6″ rims look sweet and I had them mounted to Yokohama tires (175/65R14) today. I am hoping they fit well and I get no rubbing. To get the car home this week, we will need to put them on since the originals dry rotted so bad after only a couple of weeks on the car, they blew out.
7/18/2011: Been busy, but I have gotten some work done on the outfitting. And found a number of hangups. I have gotten the pedal boxes installed and lines connected, but did not have the guts to fill with DOT5 fluid yet. I bent them by hand, and hopefully they seal right. The distribution box for the brake lines was in rough shape, so I hope it holds up and does not leak. The lines did not come out as clean as I would have liked, but I have not done a lot of pipe fabrication before. They are at least better than the originals. I also got the emergency brake hooked up, but need to adjust. I also installed the steering column, center backup light assembly and front light buckets. The after market front and rear flashers need modifications to fit the original holes, of coarse mine are different than other years.
One of the tweaks I made to the dash to switch to a round hazard switch burned me, the woodworker made the hole for a flasher light, which is larger, so it needs to go back and be modified back for the rocker style. Which in the end, will make the wiring easier. Which leads me to issues with the harness I bought from Rimmer Brothers, which turned into a mess. I tried to go with a Mk IV so it handled the alternator I added, but that was a mistake, too different, so I swapped for the correct one for 1970, which came in without the grommets installed and all the bullet ends missing. They, after a huge delay, are sending me a newly built one, hopefully correct and finished this time. So I am on a delay for the wiring. I did start to put the dash back together, below is a nice shot of the custom center console as well as a shot of the engine compartment with some pieces back in. I want to get the gas tank back in, but I seem to need to figure out the location of the fuel line, it was not where I remembered it, so it must need to be cut into the boot floor.

Engine compartment starting to come together.
It is amazing how many pieces you can forget to order until you start to put things together. I totally forgot the dust boots for the pedal boxes, not to mention I lost the dust guards for the door straps. Even now, after I ordered a bunch if stuff, I just remembered some things I left out of the order.

Center console with the custom setup

Driver side consol
8/14/2011: Got some time this weekend to spend on Shemp, and made some good progress. Installed the windshield (wishing I bought new glass, the used one out of the spare TR4 was a bit scratched, but will be ok in the end. Tried Eastwood’s glass polishing kit and it cleaned the haze, but did not touch the scratches.
I also pressurized the front brakes and they seem to work well. I will need to power bleed the backs and adjust them, but can not do it on the quick lift since I can not take the wheels off while it is on the lift.
I also installed the lettering and front badge, and I am loving the fact I went back and used the ’69 setup and the Mk 2 front badge, they really look much better than the plastic ’70 versions. Thus I was able to mount the deck lid after I was able to get the gas tank in. Used the new gas tank kit from VB and it went in with only a little bit of effort. The pipe fitting is way too tight, not sure why the threads are tight, but will have to live with it, hopefully it will not leak. I drilled the hole and mounted the short piece of gas line through the trunk.
I took some more pictures of the dash after installing the gauges. I also cleaned and re-lubricated the tach and speedo cables. Used WD40 to clean them and then lithium grease to lube them. They are mounted waiting for grommets and to be connected to the gauges, I also ran the wiper lines, two different sizes, smaller one from the tee to the sprayers and then a larger one for the tee to the pump and the pump to the bottle. Connected the heat controls as well. I am now waiting on the wiring harness and will continue to finish getting the trim and lights mounted. Got the rear lights on, but still need to drill the front flashers and mount them.

Rear view just waiting for the bumpers.

Front view with the windshield installed and badging on.
5/28/2012: It has been awhile since I updated this page. But I have gotten a few things done, even after running into a ton of little holdups. The big one was the toggle hazard switch from VB is wrong, whoever there supplier is, they are building the switch wrong, wound up having two from them and returned both. I wound up getting one off ebay that buzzed out correctly and I was able to get the dash together. Another item was getting a new foam crash pad (which I needed before the dash could be installed, wound having to wait months for one to come into Spitbits). With those items I was able to wire up the harness and start working on getting it started. Ran into even more issues. The wiring harness from Rimmer Brothers, both the first one and the second one they sent me were made wrong. The terminals that go into the fuse box were keyed backwards so they would not lock in (had to splice in my old ones from the original harness) and the rear harness was missing all the bullet connectors. After getting it all connected I found the flasher relay connector was pinned wrong so the flashers were on all the time, had to swap two pins in the connector to fix.
I also wound up stripping the nutplate that holds the steering column up and luckily a member of NASS had a spare one that he sent me and I was able to keep going. I got all the wiring working, the only question mark is the fuel gauge (have not put in enough gas to know if it works).
I installed the front bumper with a little bit of pain to get it to align with the front bolt holes. This was a repaired bumper from the original bonnet (the bonnet on the car was from a 1969 car from Maine), and thus it was a big break of luck that it worked. I guess the guys at NuChrome had a good template to work from to get it as close as it was. The rear bumpers do not seem to align right, I may not have drilled the side holes in the right location, plus the brackets may be a little bent. I gave up for now and will worry about it later.
Now that I had all the wiring right, the dash together, I was ready to try to start it. It had been on a Kwiklift for several months and I needed to get the space back in the garage and give the lift back to my friend. So after it was back on the ground I decided to see if the clutch worked…. I guess I gave the lift up too soon, I should have checked that the clutch would disengage earlier, it was stuck or was not installed right. After a few discussions on the NASS forum, they suggested it may just be stuck and to get it running and try to pop the clutch free. I was skeptical since this was a nice clean new flywheel and clutch. But I decided to try getting it running and see if it worked.
I finished connecting the fuel lines and put some gas in the tank, which soon made its way to the floor. It leaked from tank, the rubber hose under the trunk, the gas pump and the bottom of the carb. I fixed the obvious ones but I still seem to have a slight leak from the pump (ordered a new cover gasket to see if that fixes that one). The card was an O-ring on the Stromberg, but even after fixing that, after getting some pressure I seem to leak around the throttle shaft. In the end, after a new condenser I had the engine running pretty well. Tried popping the clutch bystarting it in gear, but it would not free the clutch. After some more discussions, I may need the Clutch fork and carrier release bearing from a 1973-1974 1500, to match the flywheel and clutch I installed (even though it was supposed to be a 1300 flywheel). So I am off to take the trany out. Good thing I had decided to hold off on the interior until I knew the trany worked, so the tunnel is still off. I will also need to solve the slow leak from the carb, so I may send that out after I fix the trany issue.
Below are the latest picks from the driveway, with the engine running.

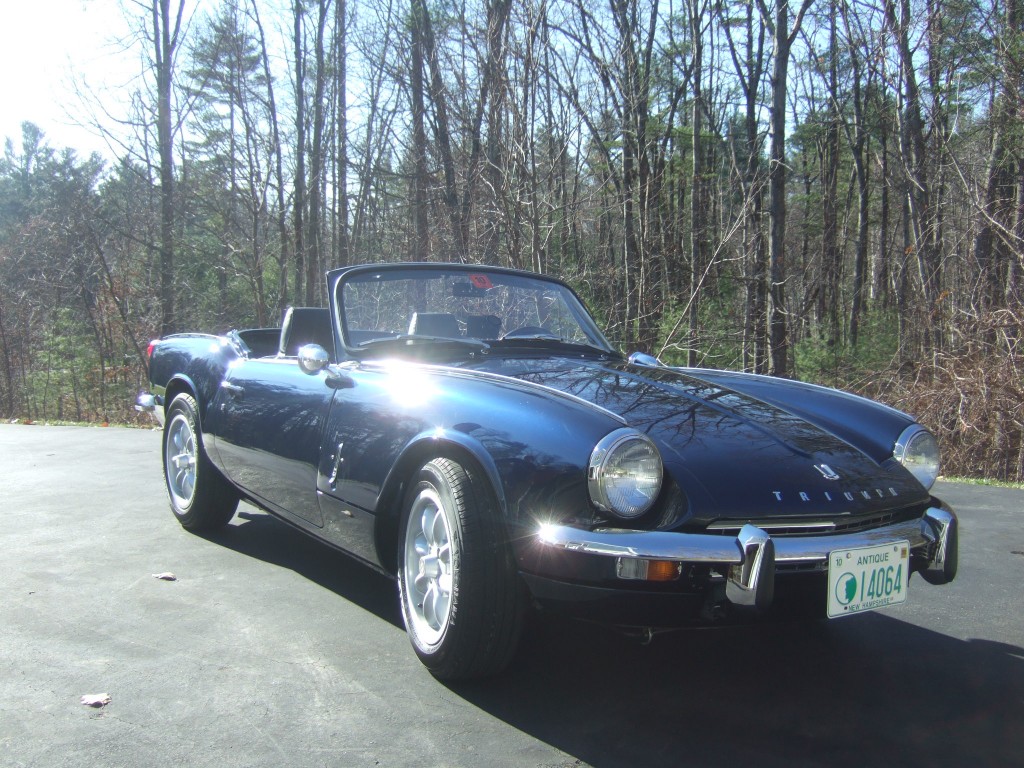
Front View with bumper and grill.

Finished Dash with new Gauges

Side View with 14″ Rims and running.
12/17/2012: Well these last updates are a little late, but finally sat down to post them. Got it back together and registered and got some miles on it over the last few months.
I got the carb back from Joe Curto, it was indeed leaking and it is now working fine (a little rich but usable). I received it at the end of August, it was the last thing I was waiting on. By that time I had removed the transmission and my brother and I saw that the clutch was made wrong and it was had no way of releasing. I dumped the aluminum flywheel, put the original back in with the new original clutch and pressure plate that I had sitting around and it was working in like 4 hours. I may try to sell the flywheel, I just did not have the time or money to try to get a new pressure plate to match it. With that installed, I was able to install the trany cover and interior, along with the correct year seats that I got from somebody on NASS. With the carb back and the car running, it was ready for field trials.
I have several bugs, some worked out. Steering was binding a certain spots due to the rack being shifted too far to the left causing the coupler to hit the tunnel opening. Fixed that, but I now need to recenter the steering wheel. I also noticed the trany was making a whining noise when the clutch was pressed, and noticed the crank has play in it, so it seems I need thrust washers. I am hoping I can do these from the bottom, but otherwise I may need to pull the engine out. I also do not have a speedo working, the cable seems to spin when I removed it from the back of the speedo, so it seems to be the gear in the trany is not engaging, so I can pull that out over winter as well. I also need to lower the rear bumpers (need to modify the mounting brackets to allow me to lower them, since I did indeed not mount the side holes in the quarter panel correctly). I will also need to get a top installed, may will need to wait till warm weather for that. Below are some quick shots from after a drive in November. I got it out as often as I could on weekends, but few chances her in NH with kids soccer games every weekend.
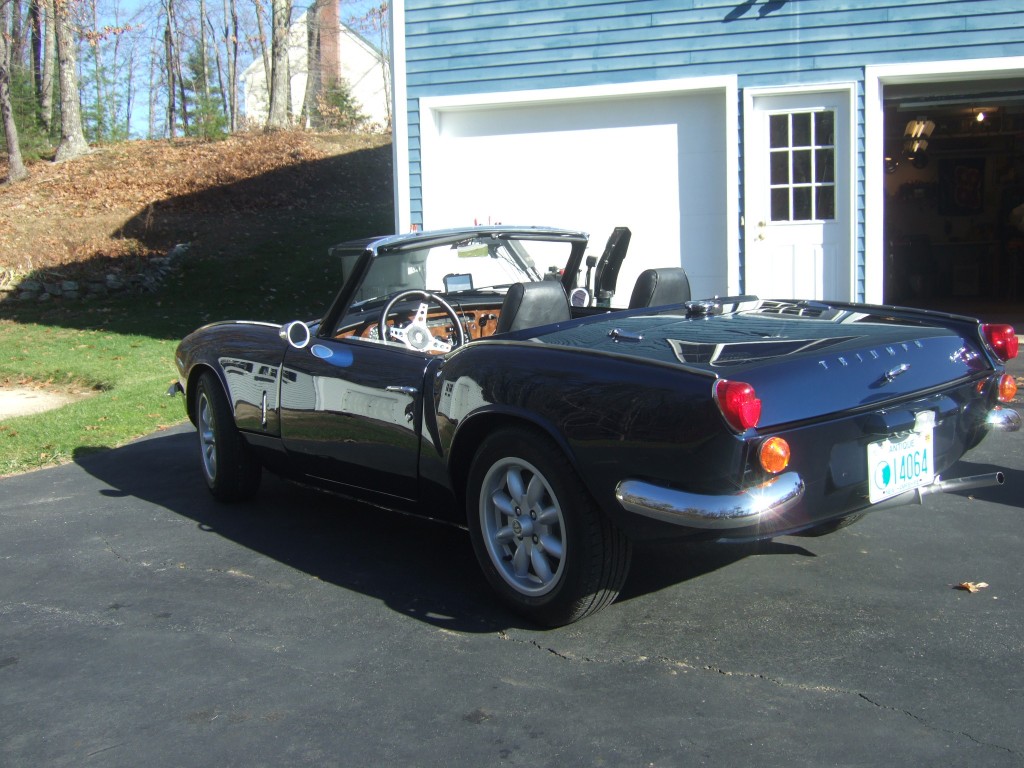
Clean Side View

Kids after a drive
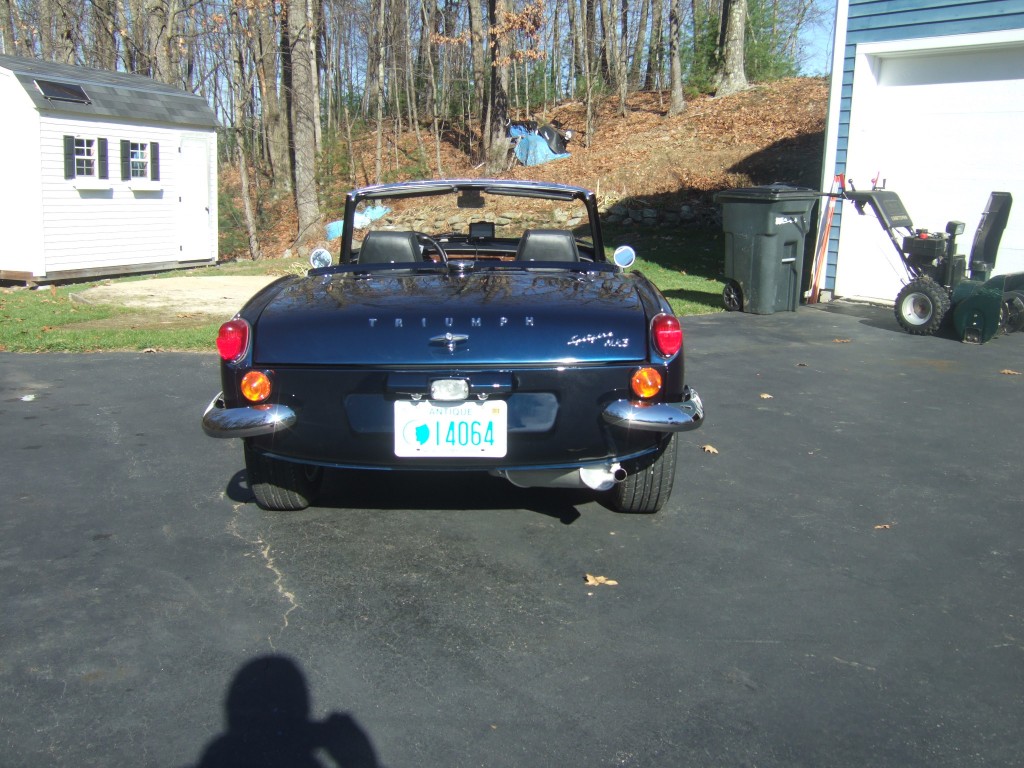
Back with bumpers wrong
Side View
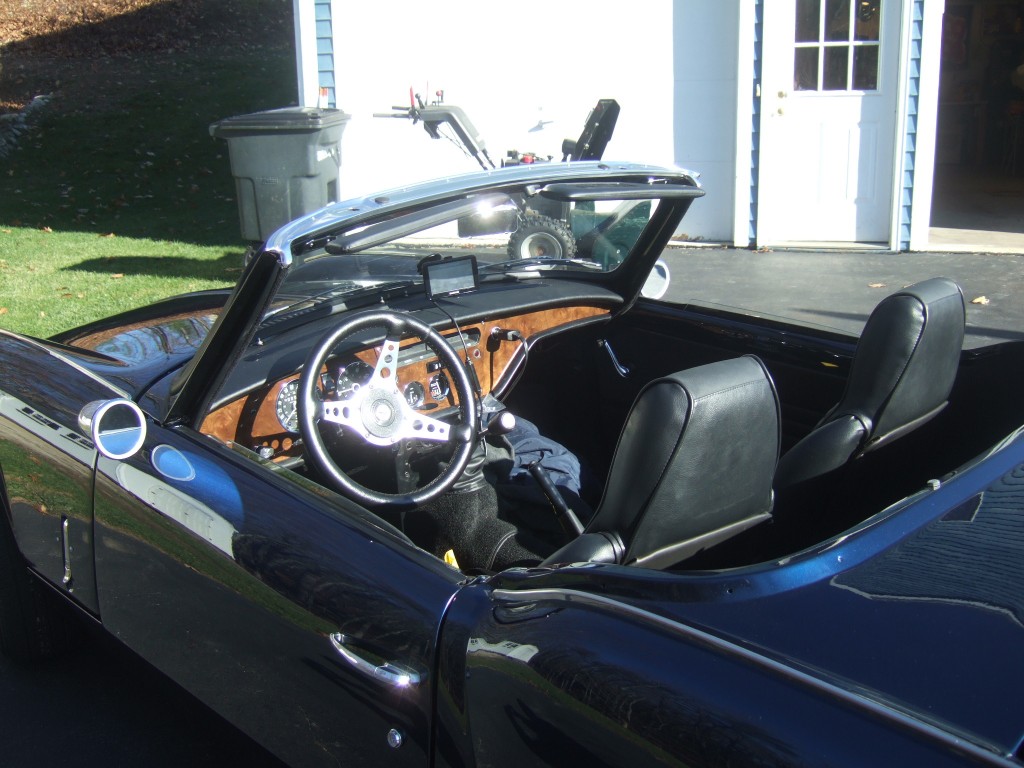
Cockpit View
Any new pictures of the dash in or anything?? 🙂